
Using a pattern routing jig made from a template
*This post is sponsored by The Home Depot
Links below are affiliate links, clicking on them helps me keep this site going at no extra cost to you . Thank you for supporting my site.
Whenever I’m building furniture with curved pieces, I often produce a template. This helps in the layout of the work piece with respect to grain direction/selection and offers me a life size visualization of the finished piece. This also gives me the ability to reproduce that piece in the future without having to “reinvent the wheel.” Another great benefit is the ability to produce work holding jigs/fixtures that help me create exact copies on the router table. Here’s how I go about producing template out of Baltic Birch plywood and pattern routing jigs
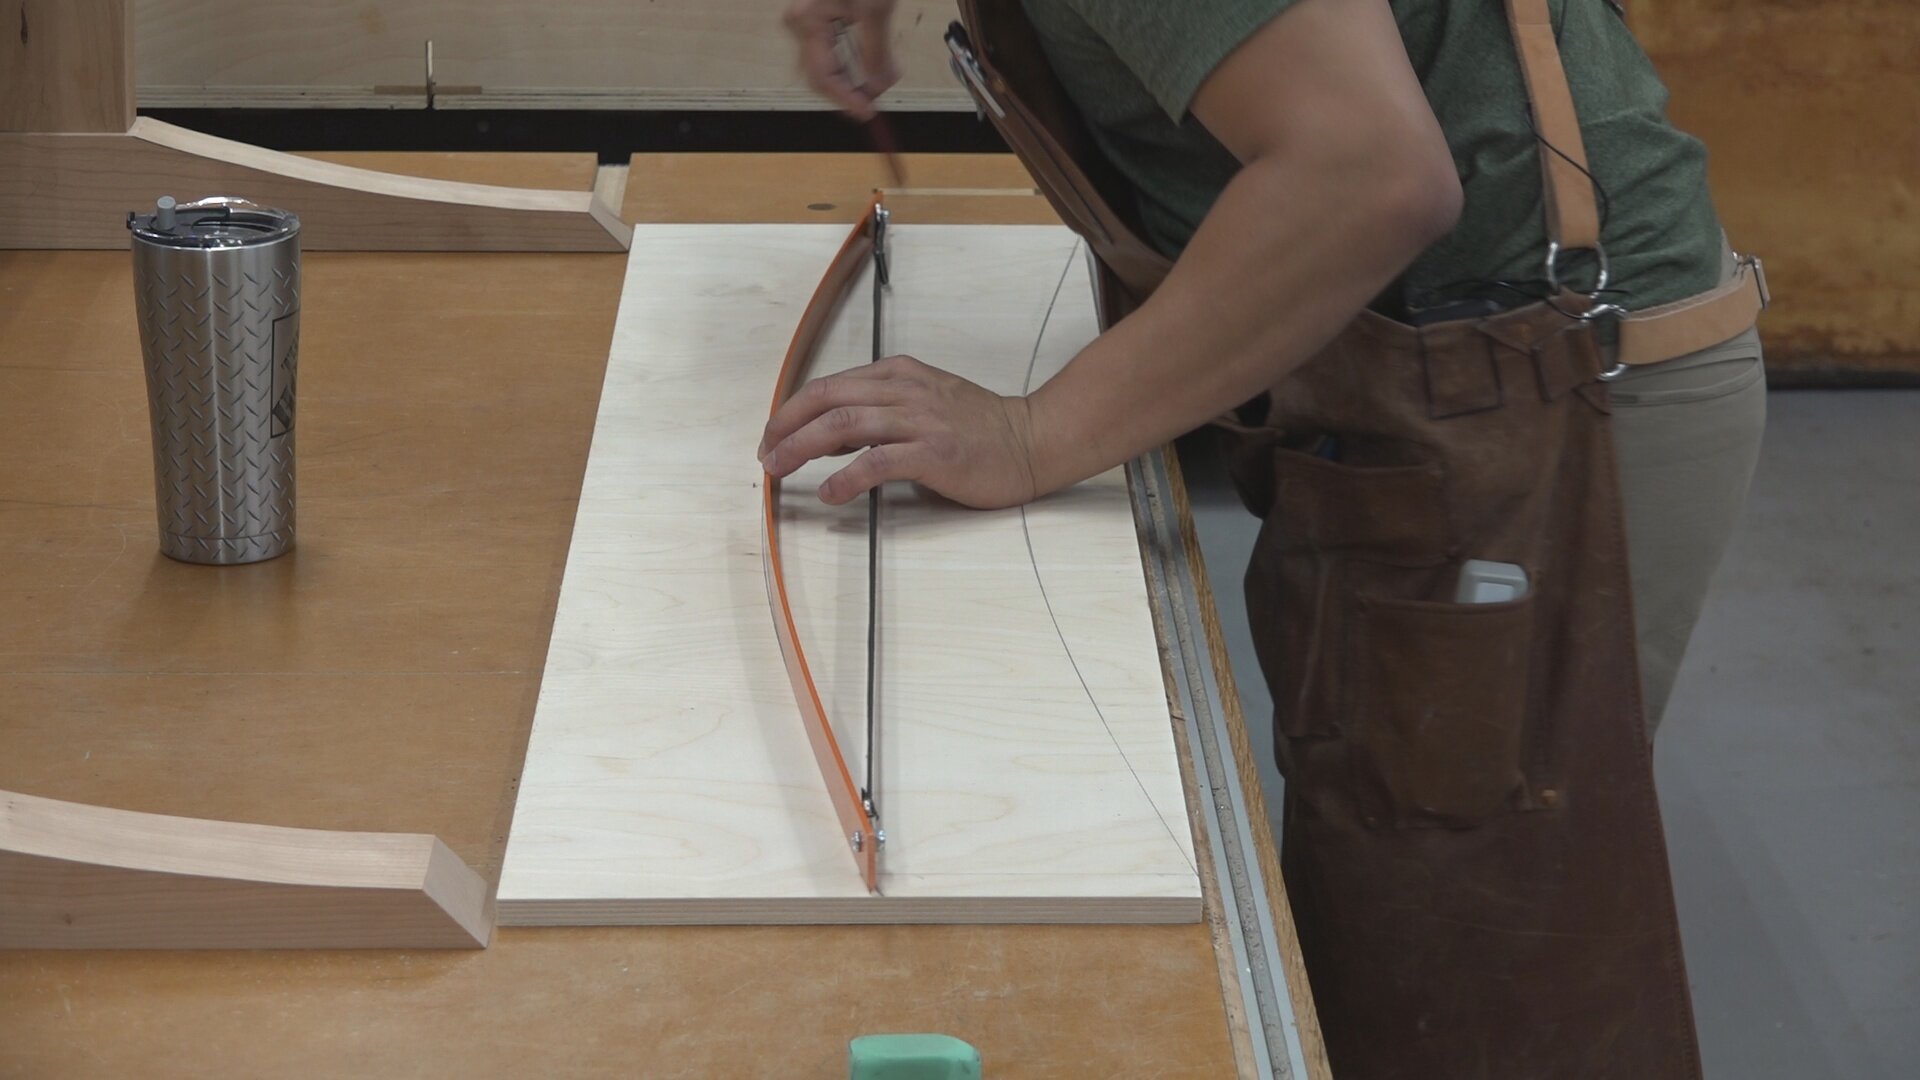
Using a drawing bow to create curves
When it comes to drawing curves, I like to use a drawing bow. A drawing bow is nothing more than a flexible piece of plastic or wood that is connected with an adjustable strap at the ends. The bow is infinitely adjustable to produce a slight curve or a drastic arc. I’ll trace out the curve from the drawing bow onto some 1/2” Baltic Birch. You can also use 1/4” MDF. I just have a lot of !/2” Baltic Birch so that’s what I use.

Cutting out the template on the bandsaw
I then go to the bandsaw and cut out the curve out of Baltic Birch making sure to leave about 1/8” heavy of the traced line. I like using the bandsaw but I’ve done this before with a jigsaw (also known as a saber saw). Generally, I use a jigsaw for bigger pieces since it’s easier to bring the tool to the workpiece.

Using low raking light to smooth the curve of the template

Using a spokeshave to smooth out the curve of the template
After cutting the template on the bandsaw, I go to my workbench to smooth out the curve and remove the rough material left by the bandsaw using a spokeshave and sanding block. I want to make sure I don’t have any bumpy surfaces. A good way to make sure I’ve removed enough material and to make sure I have a smooth curve is to have low raking light. I used the Milwaukee 18-Volt Lithium-Ion Cordless Rocket Dual Power Tower Light as my light source. It’s adjustable up to 7-feet and runs on either AC power or M18 batteries. This makes the light extremely versatile for all types of lighting applications.
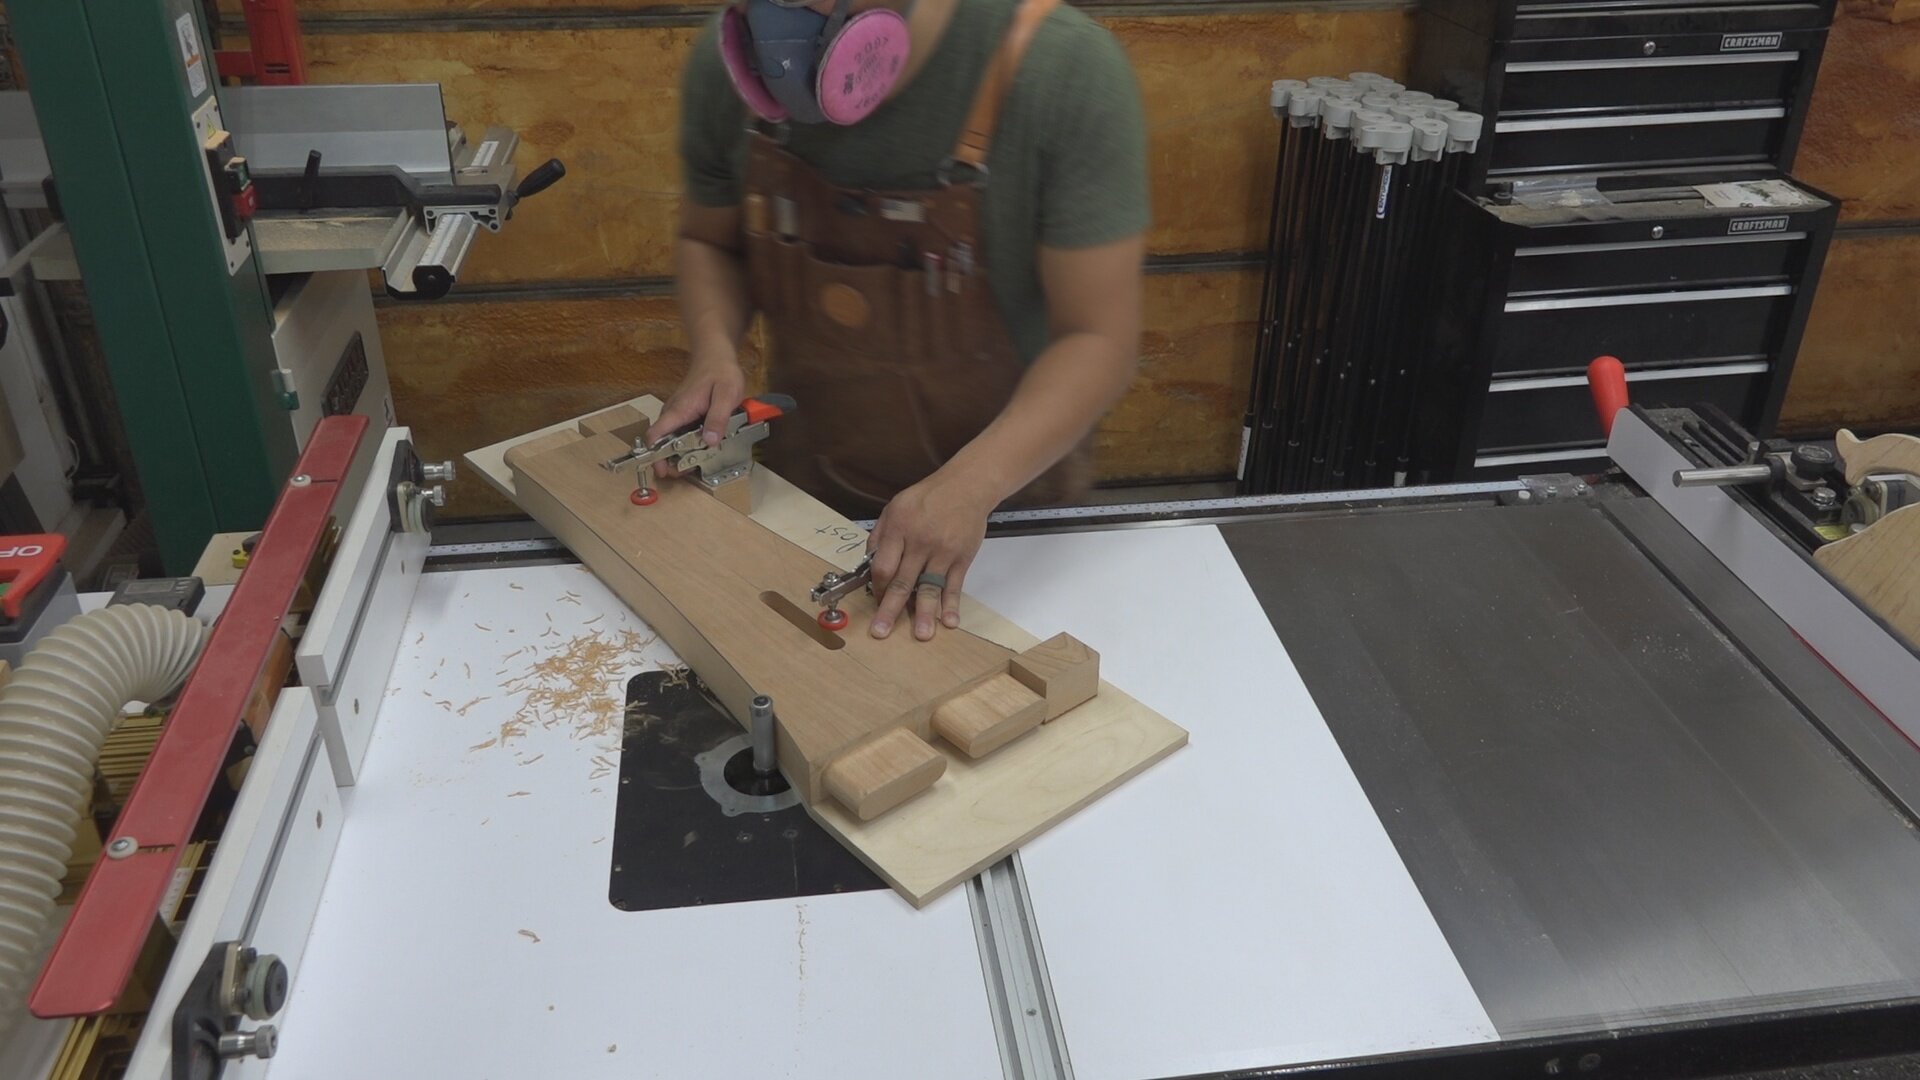
Once I’m happy with the template, I’ll then start making the pattern routing jig. The pattern routing jig is also made of Baltic Birch but is oversized to accommodate for wooden blocks that register off of the tenons on my workpiece and also act as mounting blocks for toggle clamps. The wooden blocks are cut to the exact same thickness as the final workpiece on the Milwaukee 18-Volt Lithium-Ion Brushless Cordless 10 in. Dual Bevel Sliding Compound Miter Saw. The length and width are arbitrary for these wooden blocks but it’s important that they are big enough to mount toggle clamps. I’ll use super glue to attach the wooden blocks and then use the Milwaukee 18-Volt Lithium-Ion Brushless Cordless Gen II 18-Gauge Brad Nailer with 2-inch brad nails to secure the wooden blocks to the Baltic Birch. Once I’m happy with the location of the support/mounting blocks, I’ll then temporarily attach the template to the jig blank with double sided tape.

Cutting support blocks for toggle clamps on the Milwaukee 18-volt 10 in. miter saw

Using Milwaukee M18 brad nailer to attach stop blocks and support blocks
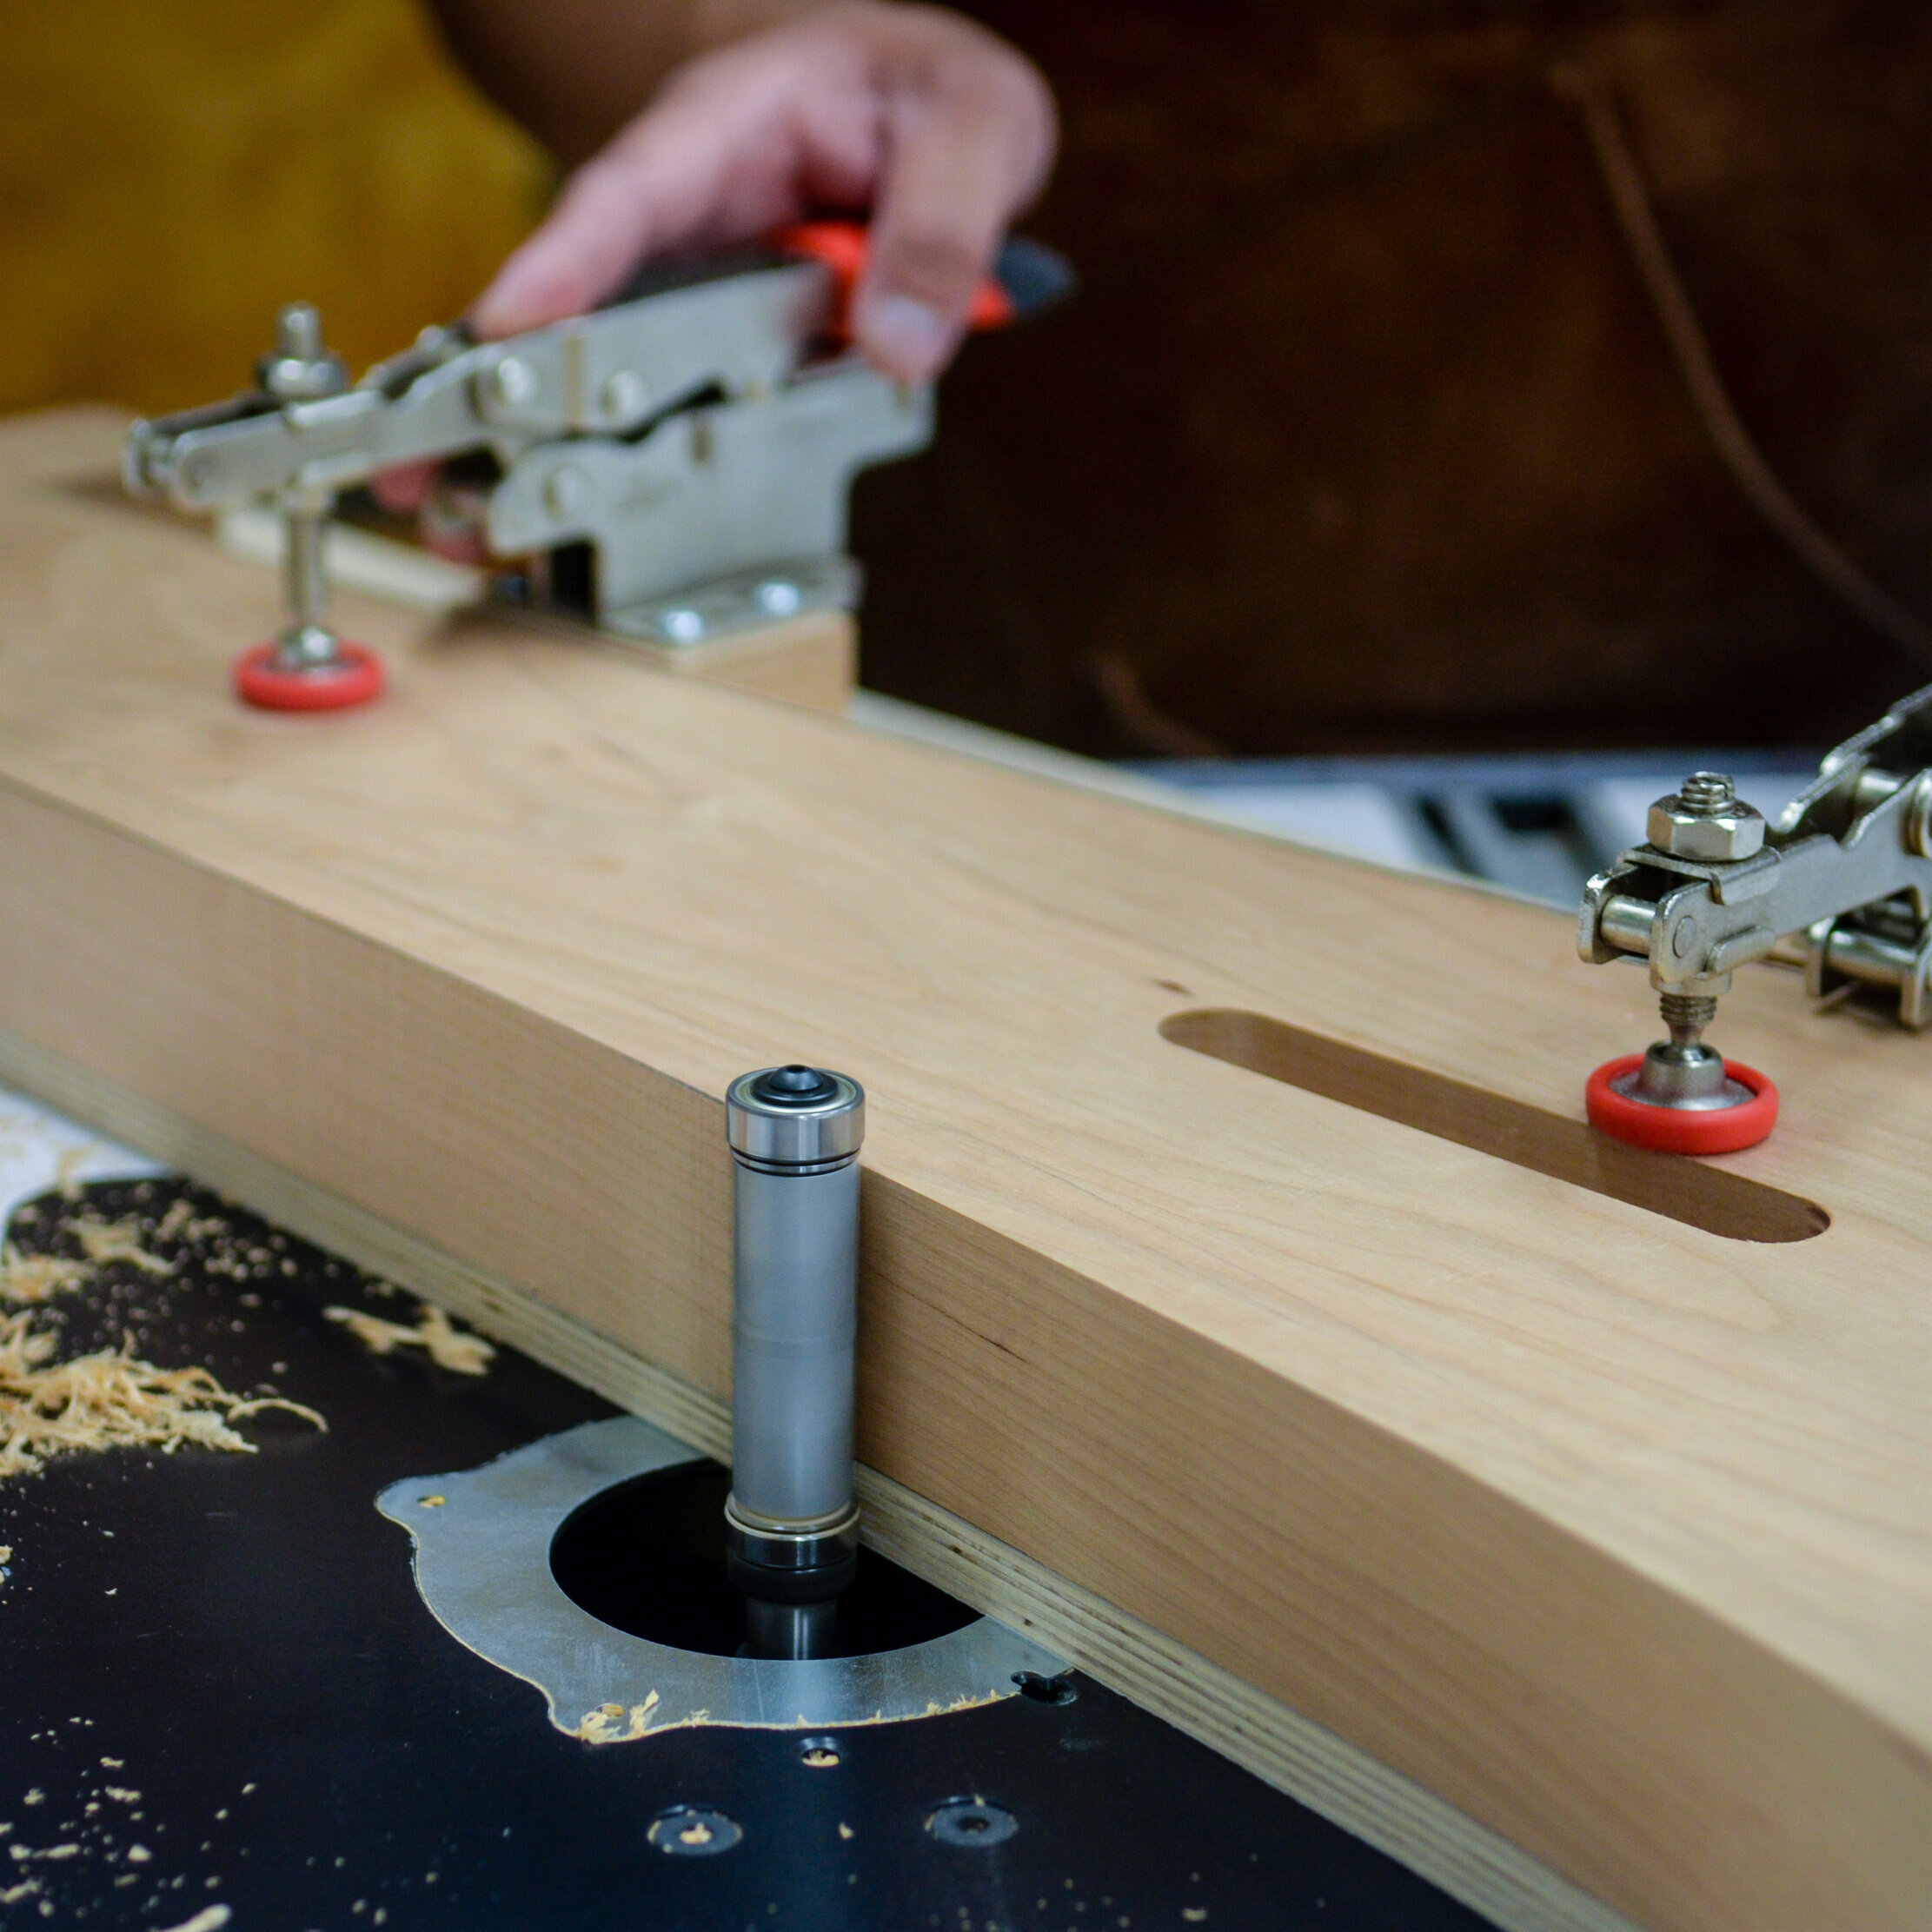
Now it’s back to bandsaw. With the template still attached to the pattern jig blank, I rough out the shape making sure to stay clear of the template by at least 1/8”. I then go to the router table and using a top bearing bit I pattern rout the template to the pattern jig.

Pattern routing the template to the pattern routing jig using a top bearing bit in the router table
I'll now remove the temporarily held template from the pattern routing jig and attach toggle clamps to the work holding blocks using 1-1/2 inch screws. I want to make sure I predrill first before driving in the screws with my Milwaukee M12 FUEL SURGE 12-Volt Lithium-Ion Brushless Cordless 1/4 in. Hex Impact Driver

Attaching toggle clamps to the pattern routing jig by predrilling and driving 1-1/2 inch screws
Now it’s time to start shaping the actual workpiece. Not only do I have a tracing template, but I also have a pattern routing jig to make exact copies of my furniture parts.
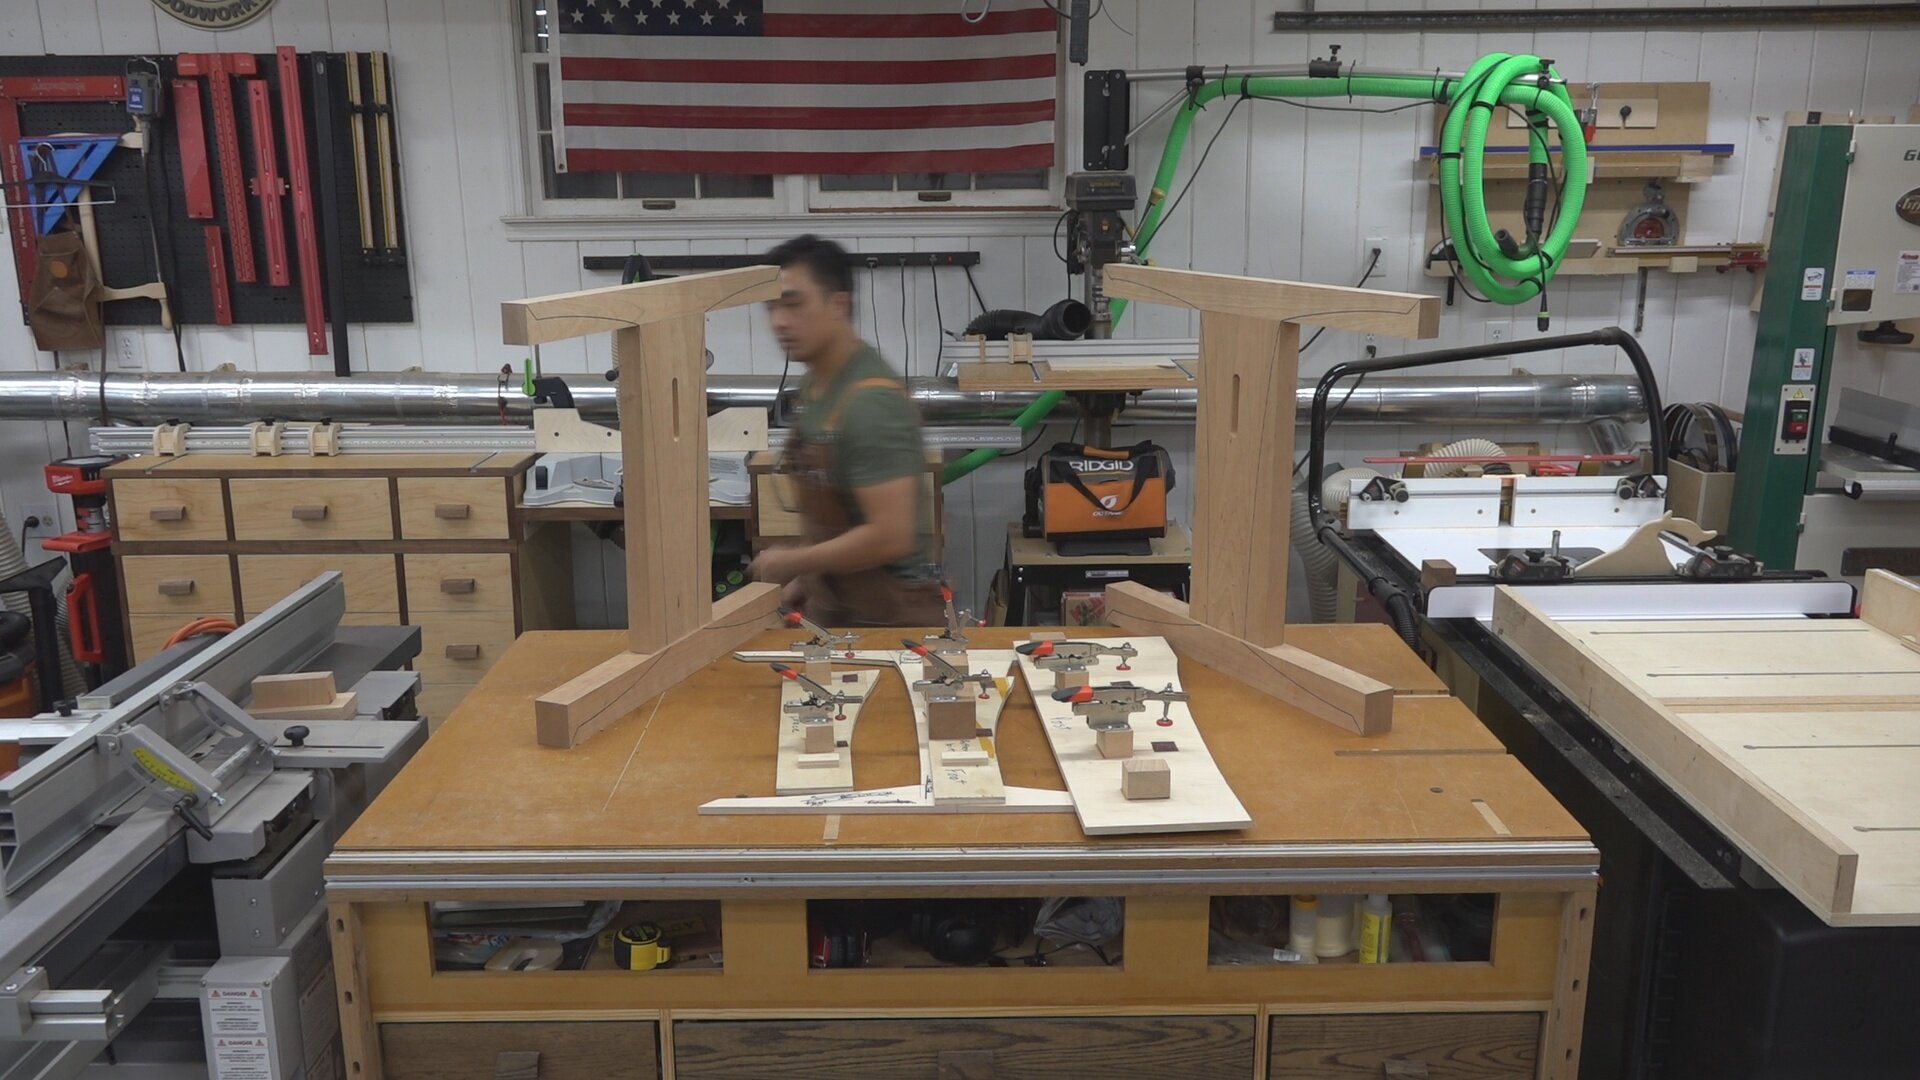
Pattern routing jigs and templates
So now I just repeat the process over again but with the actual workpiece. First I’ll trace out the template on the workpiece. Then I’ll rough out the shape on the bandsaw. Next I’ll pattern rout using the pattern routing jig and this time, a bottom bearing bit on the router table.

Tracing out the template

Rouging out the shape on the bandsaw
Pattern routing on the router table using a bottom bearing bit

Multiple exact copies can now be produced